What is a 404 Error page + How to customize in Squarespace

A 404 is a standard error message that appears when the page on a website that you were searching for wasn't found. This error message typically is because either the page you were looking for was removed or moved so the url (web address location of the page) no longer matches the link. There is also the possibility that a typing error was made when searching for a website address. It happens.
By default, Squarespace has a built in 404 Error page. This is what it will look like:

However, Squarespace also allows you to use a custom page as your Error / Not Found page.
Why you should customize your 404 page
Creating a custom 404 page is actually an effective way to keep your website brand identity and possibly keep a visitor from getting frustrated and just leaving your site!
If you are a vacation rental host, every part of your website is a chance to reflect your hospitality — even when things go a little off track.
A custom 404 page helps you:
Keep visitors engaged instead of bouncing off your site.
Reflects your brand personality — playful, modern, luxe, etc.
Guides visitors back to what matters — like feature blog posts, or for vacation rental hosts, property listings or booking page.
Instead of a dead end, think of your 404 page as a gentle nudge: “Oops! Not here, but let’s get you back to your perfect stay.”
Have fun with your Not Found page and grab attention with a clever headline!
I was recently reading an article on Creative Bloq that shared some brilliant error pages — Genius examples of 404 pages. Check out my Instagram reel with a snapshot of a few of my favorites!
How to add a custom 404 Error page in Squarespace
First, you need to create and design a new unlinked (so it won’t show up in your navigation) page.
From the Home Menu, go to Pages.
Under NOT LINKED, click the + on the right to create a new Blank page.
Name your page. You can simply name it 404. This will also create the url slug for the page (www.YOURDOMAINNAME.com/404)
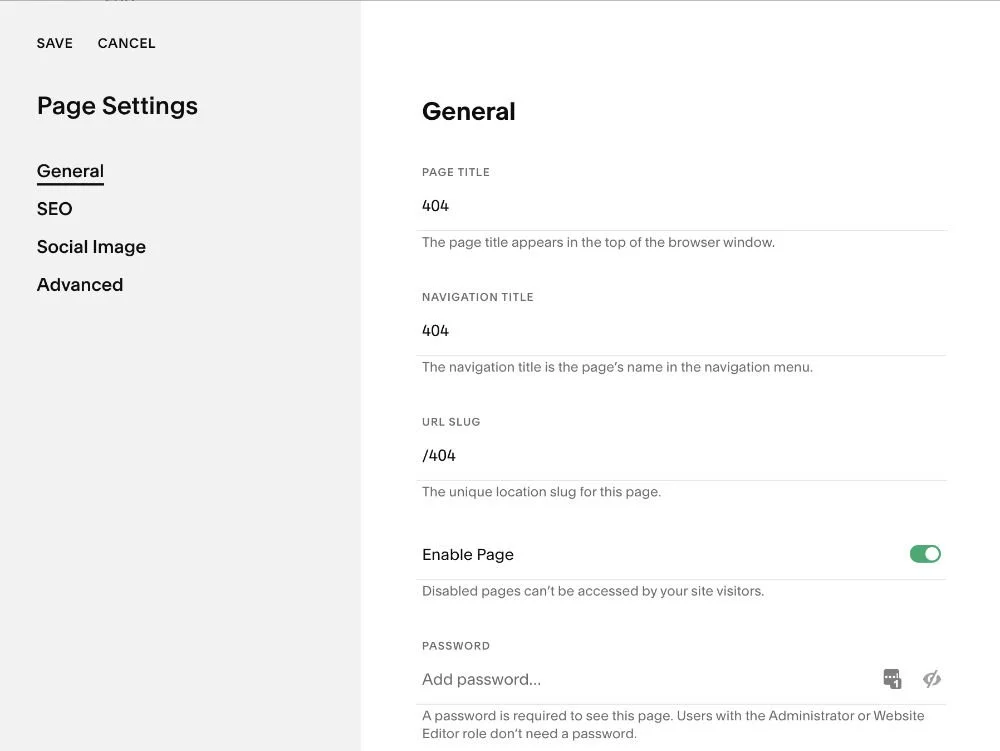
In the Page Settings, be sure to also go to SEO and choose to Hide Page from Search Results. This page is not necessary to be found in a Google search. Unless it really is so cool that even Google should see it! 😎 (And it is full of quality Google-worthy content!)
4. Design your unique new error page!
Remember, you can include anything you’d like to acknowledge the missing page and guide your visitor to another location or back to the home page. A couple ideas include adding a Search block, feature your latest Blog posts, or add a Contact form to create a connection from there.
After you have created the error page, you need to link it so that it’s the page that appears when the server is unable to locate a page.
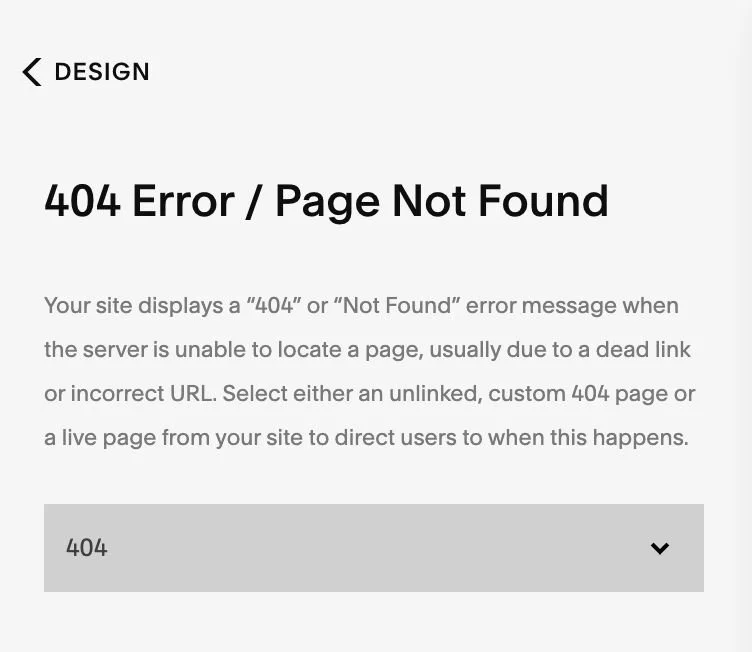
From the Home Menu, go to Design / 404 Page
From the dropdown menu, choose the 404 page that you created.
Click SAVE and you now have your very own custom 404 Error page!
A custom 404 page is a small but powerful detail, especially for hosts running direct-booking websites. It shows that you care about every part of the guest journey, even the moments that don’t go as planned. So next time a traveler takes a digital wrong turn, you can help them find their way back to a great stay — and maybe even get them to book.
Thoughtful touches like this show visitors you care, even in unexpected places.
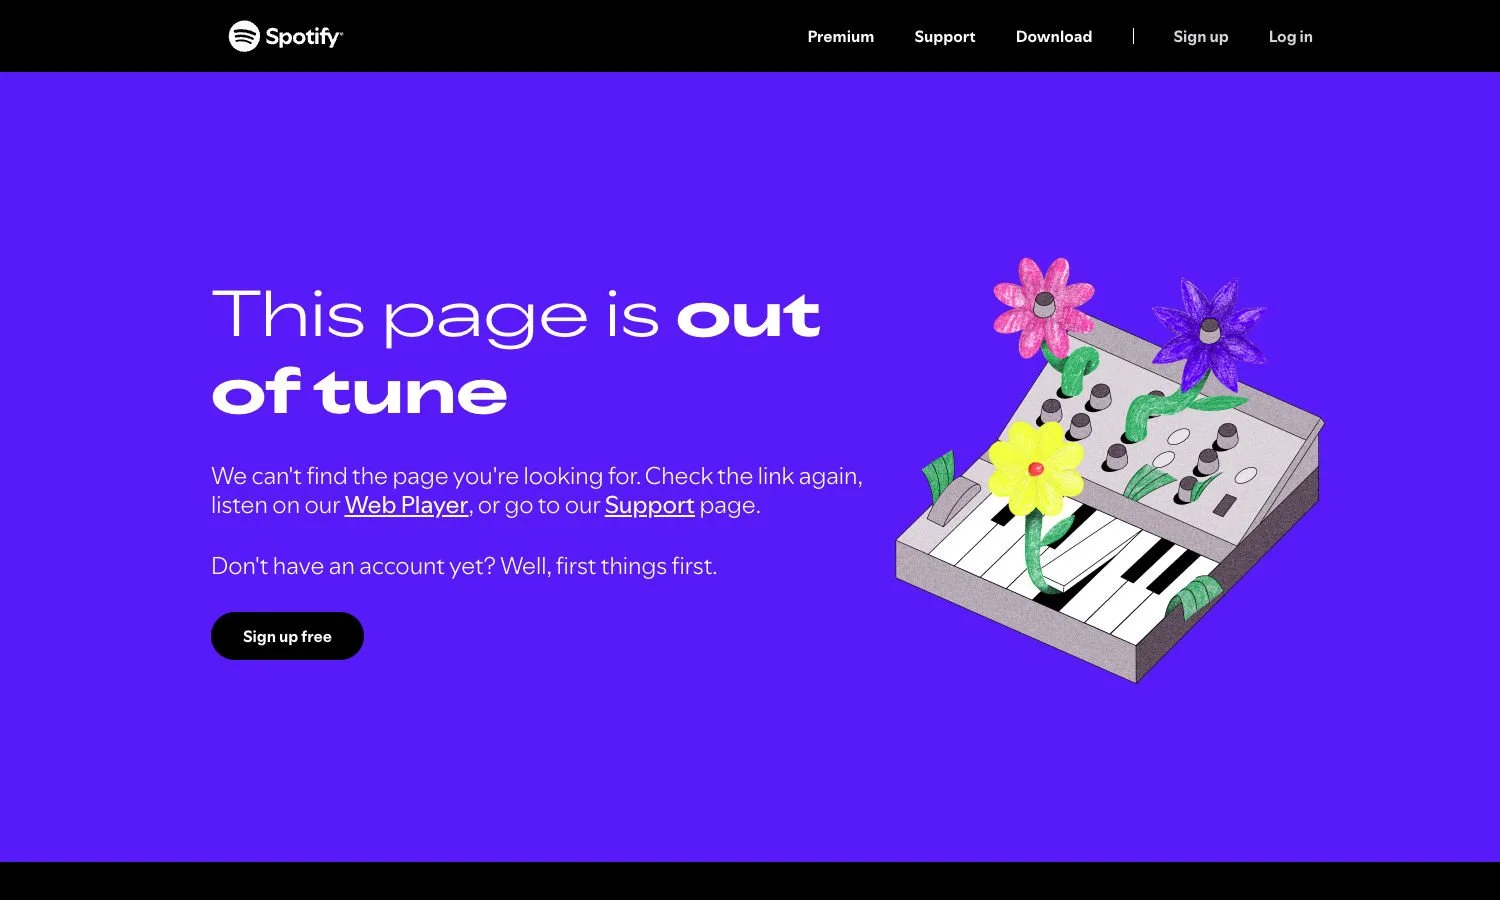
And now I’ll leave you with an example of a good 404 page! And if that put you in the mood for some good tunes, enjoy this fun playlist on Spotify — wish you were here 🎧
Save to Pinterest ♡